
首先开始的便是文档定义:
1 | \documentclass[bachelor]{njupthesis} |
查看: https://blog.csdn.net/wei_love_2017/article/details/86617235
可以看到这边的documentclass是自定义的,原因是因为这个使用的是郭学长做的毕设latex模板, 因此借此机会也学习下Latex的模板制作, 主要是cls文件的编写
cls文件是什么?
LaTex中常见的文件格式有.tex, .bib, .cls, .sty, .bbl等。
- .tex文件也就是我们写文档内容的文件;
- .bib是使用bibligraphy方式导入参考文献时,写参考文献的文档;.bbl是其编译之后形成的文件;
- .sty是包或者风格文件,通常使用
\usepackage导; - .cls是类文件,通过文档最前面的
\documentclass命令导入
一般来说,.cls 和 .sty 文件都是增加 LaTeX 功能的补足文件。它们在我们排版文章是时对应的使用 \documentclass{} 和 \usepackage{} 加载;在包内部则对应的使用 \LoadClass,\LoadClassWithOptions 和 \RequirePackage,\RequirePackageWithOptions 加载。
cls与sty不同点
虽然它们都可以包含任意的 TeX 和 LaTeX 代码,但是它们的使用方式不同。我们必须通过 \documentclass 加载一个类文件,并且在一个 LaTeX 文件中只能出现一次,通常也是第一个出现的命令。而另一方面,包是一个可选项,它可以根据我们的需求加载任意多个(在开始文档之前)。
cls文件怎么写的?
cls文件可以分为四部分,我暂且分别称之为声明、宏定义、输入数据处理以及其他四部分
-
所谓声明,只是说明了编译cls文件需要什么样的TeX格式以及本cls文件可以提供什么内容,基本上是万年不变的,如下:
1
2\ProvidesClass{resume}[Mylatex] % 其中,[ ]中的内容可以随便填写呀~
\NeedsTeXFormat{LaTeX2e} -
第二部分,宏定义,这部分内容则是各取所需了,如果有需要,可以在此进行简单的定义,我在此定义了两个\newif,用于判断中文简历和英文简历:
1
2\newif\ifChinese
\newif\ifEnglish -
第三部分,处理输入数据,也就是上文提到的
\documentclass[a4paer,12pt]{article}中的a4paper和12pt这两条数据1
2
3
4
5
6
7
8
9
10
11
12
13
14
15
16
17
18
19
20
21
22
23
24
25
26
27
```latex
\DeclareOption{zh}{\Chinesetrue\Englishfalse}
\DeclareOption{en}{\Chinesefalse\Englishtrue}
\DeclareOption*{%
\PassOptionsToClass{\CurrentOption}{article}
}
\ProcessOptions\relax
\LoadClass{article}
% 对于zh,我进行的操作是将\Chinese这个变量设为true,\English这个变量设为false,以便在后续使用第二部分定义的\if,
% 第三条语句为将初zh, en之外的其余参数传至article类,供article类进行处理,最后呢,就是加载继承的article类;——如郭学长njupthesis所做的处理为: \LoadClass[12pt, openany, twoside]{book}
```
4. 第四部分,会先导入需要用到的包,之后将上面的零散语句贴上去。在tex文件中,导入包通常使用\usepackage命令,但是在cls中,一般要使用\RequirePackage的方式将其导入,如:
```latex
% Customize the section headers
\RequirePackage{titlesec}
% footnote
\RequirePackage{fancyhdr}
% Set the margins
\RequirePackage[margin=0.5in]{geometry}
\RequirePackage[T1]{fontenc}
```
最后,在.tex文件中通过`\documentclass{Mylatex}`来使用该cls文件即可
\ProvidesClass
1 | \ProvidesClass{njupthesis} |
- ProvidesClass为定义出的模板class名
- LoadClass为documentclass中原先指定的参数
\DeclareOption
1 | \DeclareOption{bachelor}{ |
关于\documentclass的option设置
\newcommand
参数说明:
\newcommand\cmd[参数个数]{命令的定义}
1 | % 姓名的字体较大,且加粗,实现方式: |
最后一个\edusubsection的效果图

分析下语法:\newcommand为自定义命令: \newcommand{<自命名指令>}[<参数个数>][<首参数默认值>]{<具体的定义行为>}
注:
- 命令只能由字母组成,不用以\end{}结尾
- 取参数时,从1开始索引
p.s. \renewcommand重新定义已有命令, 语法跟\newcommand相同
\DeclareCaptionFormat
设置题目标题格式
1 | \DeclareCaptionFormat{algrule}{% |
\graphicspath
设置图片路径
1 | \graphicspath{{./pic/}} |
\titleformat
设置各个title格式
1 | \titleformat{\chapter}[block] |
\newtheorem
\newtheorem{theorem}{Theorem}[Chapter]
引用
\citing
设置引用
1 | 当代生活\citing{pedregosa2011scikit}是严肃文学大师的作品。 |
\ref
如图所示
1 | % 可自动渲染成如图2-1所示 |
\bibliography
1 | \bibliographystyle{IEEEtran} % 按照IEEEtran.bst的样式引用 |
\newenvironment
\newenvironment{新环境名称}[参数个数][参数默认值]{开始部分定义}{结束部分定义}、\renewenvironment{新环境名称}[参数个数][参数默认值]{开始部分定义}{结束部分定义}
其中参数的用法和\newcommand 相同,最多允许9个参数,顺序使用#1、#2等引用参数。如果没有使用参数,则[0]可以省略。假设myenv环境的调用如下:\begin{myenv}{arg_1}…{arg_k}
则可以在“开始部分定义”中使用#1,…#k来引用参数,这是newenvironment传递参数的方式。需要特别注意的是,newenvironment的参数只有在“开始部分定义”中才能使用,即“结束部分定义”中的代码无法获取参数。因此,如果要在“结束部分定义”中使用新环境的参数,必须在“开始部分定义”中保存到寄存器中,比如通过\newsavebox 和\sbox 等命令。
举例:
先看一个简单的文章“摘要”(Abstract)的例子:假设,摘要的标题—摘要(Abstract)两个字加粗居中显示,正文使用quote格式,完整的示例文件参见2。
1 | \documentclass{article} |
bst文件
Latex: 制作和修改需要的参考文献格式(.bst)
一般的期刊或者会议都会提供参考文献格式模板(.bst),但是如果没有提供的话,你可以选择自己制作一个bst或者寻找类似的再修改bst文件。这是一篇教你制作需要的参考文献格式(.bst)的文章。文章主要包括两方面内容:1、从头制作.bst文件,包括对book,article,proceedings等等进行格式设置;2、根据需要微调做好的bst文件。(建议看下文档A BibTEX Guide via Examples)
如果参考文献格式要求排序按出现顺序,引用方式为数字,作者只出现三个,超过三个用et al 表示。例要求参考文献格式为:
Journal articles
[6] Borwn, L., Thomas, H., James, C., et al.:'The title of the paper, IET Communications, 2012, 6, (5), pp 125-138
bst文件编写
write$为输出内容;missing$为缺失一般配合if$使用
1 | Entry{ |
njupthesis
\makecover 封面
1 | \newcommand{\makecover}{ |
\thesistableofcontents 目录
1 | % TODO: 更改目录样式 |
\thesisappendix 附录
1 |
|
\thesisacknowledgement 致谢
1 | \newcommand{\thesisacknowledgement}{ |
\thesischapterexordium 章绪论
1 | \newcommand{\thesischapterexordium}{ |
\thesisloadbibliography reference引用
1 | \newcommand{\thesisloadbibliography}[2][]{ |
使用
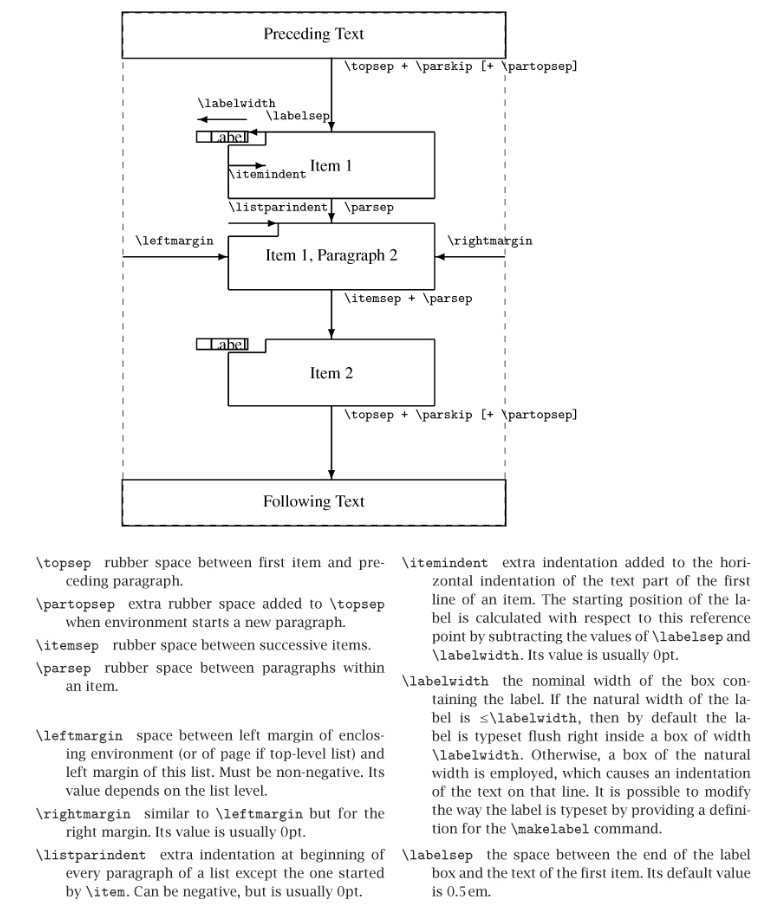
LaTeX 中列表环境的使用——有序序号和无序序号
-
enumerate:
-
enumitem: 是enumerate的封装, 增加了预设的缩进等设置
1
2
3
4
5
6\begin{enumerate}
\renewcommand{\labelenumi}{(\theenumi)}
\item
\item
\item
\end{enumerate}
图片的插入及排版方法——并排插入图片
1 | \begin{figure}[htbp] |
解释一下每一句的功能:
- Line 1:
\begin{figure} ~ \end{figure}是固定用法,只要插入图片,就需要有这么一对儿;方括号[]内是控制参数,控制了整幅图的位置;- 图片位置控制参数:
\begin{figure}[htbp][h]表示当前位置(here),也就是说图片将放在你设置的当前位置,但是如果这一页的空间不足以放下这个图片,此时图片会转到下一页;[t]顶端(top),此时优先将图片放置在页面的顶部;[b]底部(bottom)此时优先将图片放置在页面底部;[p]将图片设置为浮动状态,系统会自动排版图片的位置;- 一般推荐这几个参数结合使用,比如:
[ht]、[htbp],此时这几种位置具有优先级。
- 图片位置控制参数:
- Line 2:
\centering表示将图片居中显示; - Line 3:
\includegraphics{}用于插入一张图片,花括号{}内就是图片的名称,方括号[]内同样是控制参数,但这里控制的是图片的显示大小;- 图片大小控制参数:
\includegraphics[scale=0.2]{girl.eps}[scale],表示按原图比例缩放,比如scale=0.2表示将原图缩小 5 倍,如果要放大只需要将 scale 设置为大于 1 即可;- 还可以直接设置图片宽高,比如
[height = 1cm, width = 2cm]。 - Latex图片旋转 缩放
- 图片大小控制参数:
- Line 4:
\caption{}是这幅图的图例信息; - Line 5:
\label{xxx}是这幅图的标签,在写论文时需要在正文中引用,这时候用标签直接来引就省去了一些不必要的麻烦;文中通过\ref{xxx}来引用
\table
创建表格
1 | \documentclass{article} |
绘制Latex表格需要用到 table 和 tabular 环境。其中 table 环境里写表格的标题(caption)、表格的偏移之类的。 tabular 环境则是绘制表格的内容。
首先是 table 环境部分,\begin{center}让表格居中,\caption{Your first table.}写表格的标题。
然后是 tabular 环境部分,\begin{tabular}{l|c|r}这里面的{l|c|r},包含了三个字母,代表了表格总共有三列,第一列靠左偏移,第二列居中,第三列靠右偏移。竖线代表列之间用线分隔开来,如果想要左右两边都用线包围起来,应该改成{|l|c|r|}。接下来就是正式的表格绘制部分。
latex里的表格是一行行来绘制的,每一行里面用&来分隔各个元素,用\来结束当前这一行的绘制。代码中\textbf{Value 1} & \textbf{Value 2} & \textbf{Value 3}\绘制表格的第一行,是三个加粗的字符串。第二行 & & \则是三个希腊字符。
接着是\hline,它的作用是画一整条横线,注意如果想画一条只经过部分列的横线,则可以用cline{a-b},代表的是画一条从第a列到第b列的横线。
参数说明:
- h here 当前位置;将图形放置在 正文文本中给出该图形环境的地方。如果本页所剩的页面不够, 这一参数将不起作用。
- t top 顶部;将图形放置在页面的顶部。
- b bottom 底部;将图形放置在页面的底部。
- p page 浮动页;将图形放置在一只允许有浮动对象的页面上。
ref:
\algorithm
算法流程图-》伪代码
概括版本
- algorithm - float wrapper for algorithms.
- algorithmic - first algorithm typesetting environment.
- algorithmicx - second algorithm typesetting environment.
- algpseudocode - layout for algorithmicx.
- algorithm2e - third algorithm typesetting environment.
from : https://zhuanlan.zhihu.com/p/145195565?from_voters_page=true
使用\algorithm编写伪代码流程时,先关注类中使用的package是什么。不然会出现冲突,比如algorithm2e与algorithmicx 就会产生冲突, 报错如下:
1 | LaTeX Warning: Label(s) may have changed. Rerun to get cross-references right. |
两者选其一即可
1 | % algorithm2e的模板如下: |
使用: https://blog.csdn.net/lwb102063/article/details/53046265
采坑
字体报错
在CLS类文件中定义了全局字体: ,由于重装系统后字体可能就安装的不全了,导致了编译报错
报错如下:
1 | kpathsea: Running mktexmf SimKai/OT.mf |
原因如下:
1 | \ifwindows |
百度之后发现SimKai就是楷体_GB2312,但是fontName并不是文件中规定的SimHei,而又找不到ttf名为SimKai的字体了, 因此直接通过解决CLS文件定义来解决问题。
-
fc-list | grep sim查找电脑上安装的字体列表,找出1
2
3
4
5
6
7
8
9
10
11
12
13
14
15C:/WINDOWS/fonts/simsun.ttc: 新宋体,NSimSun:style=常规,Regular
C:/WINDOWS/fonts/simfang.ttf: 仿宋,FangSong:style=Regular,Normal,obyčejné,Standard,Κα
νονικά,Normaali,Normál,Normale,Standaard,Normalny,Обычный,Normálne,Navadno,
Arrunta
C:/WINDOWS/fonts/simsunb.ttf: SimSun\-ExtB:style=Regular,Normal,obyčejné,Standard,Κα
νονικά,Normaali,Normál,Normale,Standaard,Normalny,Обычный,Normálne,Navadno,
Arrunta
C:/WINDOWS/fonts/simhei.ttf: 黑体,SimHei:style=Regular,Normal,obyčejné,Standard,Καν
ονικά,Normaali,Normál,Normale,Standaard,Normalny,Обычный,Normálne,Navadno,Ar
runta
C:/WINDOWS/fonts/simsun.ttc: 宋体,SimSun:style=常规,Regular
C:/WINDOWS/fonts/PERTILI.TTF: Perpetua Titling MT:style=Light,Mager,Fina,Maigre,Chiarissimo
C:/WINDOWS/fonts/simkai.ttf: 楷体,KaiTi:style=Regular,Normal,obyčejné,Standard,Κανο
νικά,Normaali,Normál,Normale,Standaard,Normalny,Обычный,Normálne,Navadno,Arru
nta因此观察到下载安装的simkai.ttf的英文名叫KaiTi
-
修改CLS文件中的定义, 将
\newCJKfontfamily{\kaiti}{SimKai}改为\newCJKfontfamily{\kaiti}{KaiTi} -
问题解决
Latex的\cite后面的参考文献显示问号 [?] + 不显示参考文献
referer:
usepackage和requirepackage的区别
"the convention is to use
\RequirePackagein a package or class and\usepackagein oa document"l.
1 | % right |
总结:
{}中的大多为具体内容,[]中的大多为option选项设置\newcommand{\xxx}相当于一个宏定义替换, 在tex中直接使用指令\xxxx即可;\newenvironment{xxx}{}相对而言复杂一点,在tex中需要用\begin{xxx} ... \end{xxx}- 横线: rule如
\midrule
Author: Mrli
Link: https://nymrli.top/2020/11/28/熟悉Latex写作/
Copyright: All articles in this blog are licensed under CC BY-NC-SA 3.0 unless stating additionally.